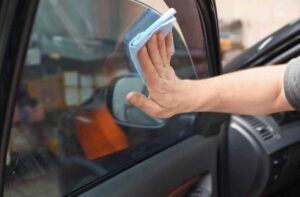
Yes, you can tint your car windows yourself. Window tint film, application tools and even pre-cut kits are readily available, and someone who is patient and comfortable working on their own vehicle can achieve a decent result.
But there is an important difference between being able to apply window tint and being able to produce a clean, professional-looking installation.
After installing automotive window film at It’s aWrap™ since 2010, we’ve seen why tinting can look deceptively simple in videos. Applying film to a relatively flat side window may seem straightforward. Controlling contamination, shrinking film over curved glass, finishing edges cleanly and completing an entire vehicle consistently is where experience becomes much more noticeable.
If you’re deciding whether to tint your windows yourself or pay for professional installation, this guide explains what DIY tinting actually involves, where beginners commonly run into trouble, what it can cost and when doing it yourself genuinely makes sense.
How Difficult Is It to Tint Car Windows Yourself?
The difficulty depends heavily on the window.
A relatively flat side window is very different from a large curved rear windshield. Someone attempting DIY tint for the first time may successfully complete one door window and assume the rest of the vehicle will be equally straightforward, only to struggle when the glass shape becomes more complex.
As a general guide:
| Window or Job | DIY Difficulty | Why |
|---|---|---|
| Small, relatively flat side window | Moderate | Film handling and contamination still matter, but the glass shape is generally more manageable. |
| Large door glass | Moderate | More film needs to be controlled while maintaining clean edges and alignment. |
| Frameless door glass | Moderate–High | The exposed edge makes accurate finishing particularly noticeable. |
| Curved quarter glass | High | Shape and access can make positioning and shrinking more difficult. |
| Rear windshield | High | Compound curvature, heat shrinking, limited working space and defroster lines make this one of the more challenging pieces. |
| Removing old tint | Moderate–High | Old adhesive, deteriorated film and rear defroster lines can complicate removal. |
| Complete vehicle | High | Producing consistently clean results across every piece requires considerably more time and skill. |
That doesn’t mean a beginner cannot learn. It means the difficulty of DIY window tinting shouldn’t be judged by the easiest piece of glass on the vehicle.
What Do You Need to Tint Car Windows Yourself?
DIY tinting requires more than the film itself. Depending on the vehicle and installation, the basic equipment can include:
- Automotive window tint film
- Application/slip solution
- Spray bottle
- Installation squeegees
- Microfibre towels or appropriate lint-free cleaning materials
- Scraper appropriate for the glass being worked on
- Precision cutting tools
- Heat gun for shrinking film where required
- A clean working environment
- Good lighting
Pre-cut tint kits can eliminate some of the film cutting required, but they don’t eliminate the need for surface preparation, film handling, shrinking where necessary, contamination control or proper installation technique.
The Basic DIY Window Tinting Process
The exact process varies by window and film, but automotive tint installation generally involves several stages.
- Clean the glass thoroughly. Contamination needs to be removed from the glass and surrounding areas.
- Prepare and size the film. This may involve using pre-cut film or preparing the film for the specific piece of glass.
- Heat-shrink the film where necessary. Curved glass may require the film to be formed before installation.
- Prepare the inside surface. Automotive window film is generally installed on the interior side of the glass.
- Position the film. Slip solution allows the film to be positioned before final adhesion.
- Squeegee out the solution. Water and air need to be worked out without introducing creases or contamination.
- Finish the edges. The final fit around the glass, seals and edges contributes significantly to how professional the installation looks.
- Allow the film to cure. The appearance immediately after installation is not necessarily its final cured appearance.
Those steps sound relatively simple when reduced to a list. The difficulty is performing each one cleanly and consistently.
Why Contamination Is One of the Biggest DIY Tint Problems
One of the biggest differences between an acceptable tint installation and a poor one can be something extremely small: dust.
The glass can appear perfectly clean and still contain tiny particles, fibres or debris that become visible once trapped between the film and glass.
Contamination can come from more than the window itself. It can come from:
- Window seals
- Door panels
- Clothing
- Microfibre fibres
- Dust in the working environment
- Hair
- Tools
- Air movement around the vehicle
This is why tinting outdoors on a windy driveway can be much more frustrating than expected. Every time the adhesive side of the film is exposed, there is an opportunity for contamination to reach it.
Once a visible particle is trapped beneath the film, simply pushing harder with a squeegee won’t make that particle disappear.
Why Rear Windshields Are Harder to Tint
Rear windshields are one of the points where DIY tinting becomes considerably more technical.
Automotive glass is not always flat. A rear windshield can curve horizontally and vertically, while window film begins as a flat sheet.
The film therefore may need to be heat-shrunk so it conforms correctly to the shape of the glass.
Too little shrinking can leave excess film that wants to crease or form fingers. Poor heat control can damage the film. Even after the film has been formed correctly, the installer still needs to move and position a large piece of film inside the vehicle without contaminating or creasing it.
Rear glass may also contain defroster lines, which deserve care during installation and particularly during removal of old film.
For someone learning DIY tinting, successfully completing the side windows does not necessarily mean the rear windshield will present the same level of difficulty.
Common DIY Window Tinting Mistakes
Most DIY failures aren’t caused by one catastrophic mistake. They’re usually a combination of small installation problems that become very noticeable once the glass is finished.
Contamination Under the Film
Dust, hair and fibres trapped beneath the tint can create visible imperfections that cannot simply be wiped away afterward.
Creases in the Film
Window film is thin. Once badly creased during handling or installation, that section may not recover cleanly.
Poor Heat Shrinking
Improperly forming film to curved glass can produce fingers, distortion, creases or damaged film.
Uneven or Noticeable Edges
Cut lines and edge finishing become especially visible around roll-down windows and frameless glass.
Using the Wrong Film
Choosing tint based entirely on price or darkness can result in buying a film that doesn’t provide the performance, appearance or longevity you expected.
We’ve discussed the material side separately in our guide to the truth about cheap window tint.
Choosing the Wrong Tint Percentage
A tint percentage that looked appropriate online may look very different once installed on a particular vehicle. Factory glass, interior colour, surrounding light and the other windows on the vehicle all influence the finished appearance.
If you’re still deciding on darkness, read our guide to choosing the best window tint percentage in Ontario before buying film.
DIY Window Tint Cost vs Professional Installation
Cost is the strongest argument in favour of DIY tinting.
If everything goes correctly on the first attempt, buying film and installing it yourself can cost considerably less than paying a professional installer.
But the realistic DIY cost isn’t always just the price printed on the tint kit.
DIY Costs Can Include:
- Window film or a pre-cut kit
- Squeegees and installation tools
- Application supplies
- A heat gun if you don’t already own one
- Additional film if a piece is contaminated or damaged
- Replacement film if you’re unhappy with the result
- Your own time
If you’re tinting several vehicles or genuinely want to learn the skill, buying tools and practising may make sense. If you’re purchasing everything to tint one vehicle once, the difference between DIY and professional installation can become smaller after mistakes and wasted material are considered.
For current factors that influence professional pricing, see our window tint cost breakdown.
The Real Advantages of DIY Window Tinting
DIY isn’t automatically the wrong decision. There are legitimate reasons someone may prefer it.
Lower Potential Cost
Labour is a significant component of professional installation. Doing the work yourself can reduce the initial expense, particularly if you already own the required tools.
You Can Learn a New Skill
For someone who enjoys automotive projects, learning how window film behaves can be rewarding. There is satisfaction in successfully completing the job yourself.
You Control the Schedule
You can work on the vehicle when convenient rather than scheduling an installation appointment.
You Can Practise and Redo It
If perfection isn’t essential and you’re willing to sacrifice some film while learning, DIY provides room to experiment.
Those are real advantages, and for the right person they may outweigh the convenience of professional installation.
The Disadvantages of DIY Window Tinting
The trade-off is that the learning process happens on your own vehicle and with your own material.
The main disadvantages are:
- A steeper learning curve than installation videos can suggest
- Greater likelihood of visible contamination
- Difficulty working with curved glass
- Potentially wasted film from unsuccessful attempts
- More time required for someone without experience
- Difficulty achieving consistent results across the entire vehicle
- Potential complications when removing an unsuccessful installation
If an existing installation has already developed bubbling, peeling or other visible problems, our guide to when window tint should be replaced explains what those symptoms can mean.
DIY Tint Film vs Professional Window Tint Film
It’s important not to oversimplify this comparison.
DIY does not automatically mean cheap film, and professional installation does not automatically guarantee premium film.
Window films differ in construction, optical clarity, heat rejection, UV performance, colour stability and warranty. The installer and the film are two separate parts of the finished result.
This is also why choosing film based entirely on VLT—the percentage of visible light transmitted through the film—doesn’t tell you everything about its performance.
Carbon vs Ceramic Window Tint
Two films can appear similarly dark while performing differently.
Carbon and ceramic films, for example, occupy different positions in the market. Ceramic films are generally selected when stronger heat-rejection performance is a priority, while carbon films can provide a more affordable option depending on the product and the driver’s needs.
We explain those differences more thoroughly in our ceramic vs carbon window tint comparison.
At It’s aWrap™, our current window tint offering includes STEK films. Regardless of the brand you’re considering, look beyond darkness alone and compare the actual film technology, manufacturer specifications and warranty.
What About Ontario Window Tint Laws?
DIY installation doesn’t remove the responsibility to consider Ontario’s vehicle requirements.
One mistake we see in online discussions is reducing Ontario tint rules to a single universal percentage. The legal considerations are more nuanced than simply saying that every window must meet one VLT number.
Where the tint is installed, driver visibility and the vehicle itself can matter. Rather than duplicate that entire subject here, read our dedicated guide to Ontario window tint laws before choosing film for your vehicle.
DIY vs Professional Window Tinting: Side-by-Side
| Factor | DIY Tinting | Professional Tinting |
|---|---|---|
| Initial Cost | Usually lower | Higher because professional labour is included |
| Installation Skill | You need to learn the process | Handled by an experienced installer |
| Tools | You supply them | Already provided by installer |
| Contamination Control | Depends heavily on your workspace and preparation | Installed in an environment intended for film work |
| Curved Glass | Can be challenging | Heat shrinking is part of normal installation work |
| Material Waste | You absorb the cost of failed pieces | Managed by the installer |
| Time | Can take considerably longer while learning | More predictable with an experienced installer |
| Finished Result | Depends on skill and experience | Generally more consistent |
| Installation Support | You troubleshoot problems yourself | Professional support and applicable warranty |
When Does DIY Window Tinting Make Sense?
We wouldn’t tell every car owner that DIY tinting is a bad idea.
It can make sense if:
- You enjoy learning automotive installation skills
- You have a clean indoor workspace
- You already own some of the necessary tools
- You’re starting with relatively manageable glass
- You’re comfortable potentially wasting film while learning
- You have enough time to work slowly
- You don’t expect your first installation to look exactly like work from an experienced installer
For someone interested in learning the trade or simply enjoying a weekend project, that can be part of the experience.
When Is Professional Window Tinting Worth It?
Professional installation makes more sense when the finished appearance is the priority and you don’t want the learning curve to happen on your vehicle.
It’s particularly worth considering when:
- You want consistent results across the entire vehicle
- The vehicle has difficult curved glass
- You’re purchasing higher-performance film and don’t want to risk wasting it
- You don’t have an appropriate indoor installation environment
- You don’t want to purchase tint-specific tools
- You value installation and product warranty coverage where applicable
- You simply don’t want to spend the time learning the process
Professional tinting isn’t just paying someone to put film on glass. You’re paying for the experience required to prepare the glass, handle the material, form it to difficult windows, control contamination and finish the installation consistently.
What Should You Do After Window Tint Is Installed?
Whether the film was installed professionally or successfully installed at home, proper aftercare matters.
Window film needs time to cure, and some temporary haziness or moisture appearance can be normal during that process depending on conditions and the film used. Avoid interfering with the film before it has had appropriate time to cure.
Once you’re cleaning the windows normally, use products and techniques that are appropriate for automotive window film. Our guide to cleaning tinted car windows covers the process in detail.
Frequently Asked Questions About DIY Window Tinting
Can a beginner tint car windows?
Yes. A beginner can learn to install automotive window tint, particularly by starting with less complex pieces of glass. However, clean installation requires patience, careful preparation and practice. Rear windshields and highly curved glass are generally much more difficult than simple side windows.
Is DIY window tint worth it?
DIY window tint can be worthwhile if saving money, learning the skill or doing the project yourself is important to you. It becomes less economical if repeated installation mistakes require additional film, tools or eventual professional removal and replacement.
Why do I keep getting bubbles in my window tint?
What appears to be a bubble can have different causes, including trapped solution during installation, contamination underneath the film or an installation problem. Freshly installed film can also look different while curing, so not every temporary imperfection immediately after installation means the tint has failed.
Can I use a pre-cut window tint kit?
Yes. A pre-cut kit can eliminate some of the cutting required during DIY installation. It does not eliminate glass preparation, contamination control, film handling, positioning or heat shrinking where the glass requires it.
Is ceramic tint harder to install yourself?
The installation difficulty isn’t determined simply by whether a film is marketed as ceramic. Vehicle glass shape, film characteristics, access, preparation and installer technique all affect difficulty. Because higher-performance films can cost more, however, installation mistakes may also mean wasting more expensive material.
Can I remove DIY tint if I don’t like it?
Window tint can generally be removed, but the difficulty depends on the film, adhesive, age and window. Particular care should be taken around rear-window defroster lines. Adhesive residue may also need to be removed before replacement film is installed.
How long should I wait before rolling down newly tinted windows?
Follow the instructions provided by the film manufacturer or installer. Cure time can vary with the film and environmental conditions, so we wouldn’t apply one universal timeframe to every installation.
DIY or Professional Window Tint: Which Should You Choose?
You can tint your car windows yourself. For someone patient, willing to practise and comfortable accepting a few mistakes while learning, DIY window tinting can be an enjoyable and less expensive project.
But if your goal is a clean, consistent installation across an entire vehicle, professional tinting has a clear advantage. Contamination control, film handling, shrinking curved glass and edge finishing are skills that improve considerably with repetition.
The decision ultimately comes down to what you’re buying: if you want the experience of doing the project yourself, DIY can make sense. If you primarily want the finished result, paying an experienced installer is usually the more predictable route.
It’s aWrap™ has been installing automotive films in Mississauga since 2010, serving drivers from Mississauga, Oakville, Milton, Burlington and Toronto. If you’re comparing film options or deciding whether professional installation makes sense for your vehicle, contact our team to discuss the vehicle, tint shade and performance you’re looking for.